Please note - I managed to write this tutorial such that it works, right up to the step where you compile Epiphany. Where it fails miserably. WebKit builds fine, and you can use the test WebKit browser without a problem, but I was unable to get it to work completely. I thought it would be a shame to let this tutorial go to waste however, so here it is. YMMV. If anyone knows how to get Epiphany to build properly, or has any other success with this, please do let me know.
It's easy to assume that Firefox is the only open source browser out there, or even that it is one of the only real options for browsing on Linux. That isn't true however, and GNOME web browser Epiphany is a fine choice for browsing on Linux.
By default, Epiphany ships with and uses the Gecko rendering engine, just as Firefox does, but it is possible to build it to use the WebKit engine. WebKit is an alternative open source rendering engine, developed by Apple and used in its Safari browser (but was originally forked from KDE's KHTML). Compiling Epiphany with WebKit has to be done when compiling it from source, unfortunately, you can't just flick a WebKit switch yet. So - let's get to the recompiling!
Be warned - this can be a lengthy and potentially tricky process. But stick with me, and we should end up with a new shiny WebKit-ised Epiphany at the end!
If you already have Epiphany installed via your package manager, I suggest you remove it now, to prevent the two versions conflicting. You can always remove your custom compiled copy and reinstall the stock version again later if you wish.
Throughout this tutorial, I'm going to assume you've created a folder called build in your home directory where all the files we use in the tutorial are. If not, you might have to adjust some of the paths in commands later on.
First of all, we need to download the source code to the current development version of WebKitGtk and compile it. The code needs to be downloaded from Subversion. Making sure you have an svn client installed, do this:
$ svn checkout http://svn.webkit.org/repository/webkit/trunk WebKit
If you're not an SVN fan, you can download a .tar.bz2 package from here as well. Once you've downloaded the source, which can take some time (it is just over 1 GB uncompressed), we have quite a bit of setup to do before we can begin compiling unfortunately. WebKit might be apparently much cleaner than Gecko is, but sadly the build system is far from simple for us Linux users at the moment.
So before we begin the compile of WebKit, use your package manager to install the following packages if they are not already installed:
- libicu-dev
- libxslt-dev
- libcurl-dev
- libsqlite3-dev
- libjpeg62-dev
- libpng12-dev
- gperf
- bison
- flex
$ sudo apt-get install libicu-dev libxslt-dev libcurl4-openssl-dev libsqlite3-dev libjpeg62-dev libpng12-dev gperf bison flex
You also need a working installation of the Qt 4 version of qmake. This is a right pain at the moment, as it means pulling down several Qt dependencies to build a GTK application, but it is a necessary evil for the time being. On Ubuntu, the necessary package can be installed with:
$ sudo apt-get install libqt4-dev
Now, I think we're just about ready to build WebKit. Phew. Warning - this next step will take quite some time, unless your system is really fast, or, heaven forbid, something goes wrong.
$ export PREFIX=/usr/local
$ cd WebKit
$ ./WebKitTools/Scripts/build-webkit --qmakearg=WEBKIT_INC_DIR=$PREFIX/include/WebKit --qmakearg=WEBKIT_LIB_DIR=$PREFIX/lib --gtk --qmake=qmake-qt4
Once that compiles, you should get a message like this:
===========================================================
WebKit is now built. To run GtkLauncher with this newly-built
code, use the "WebKitTools/Scripts/run-launcher" script.NOTE: WebKit has been built with SVG support enabled.
GtkLauncher will have SVG viewing capabilities.NOTE: WebKit has been built with experimental SVG features enabled.
Your build supports basic animation, filters, foreignObject & use support.
===========================================================
The good news is that's the bulk of the work done now, we just need to copy WebKit in place, test it and then work on Epiphany.
$ cd WebKitBuild/Release/
$ sudo make install
$ cd ..
$ WebKitTools/Scripts/run-launcher --gtk
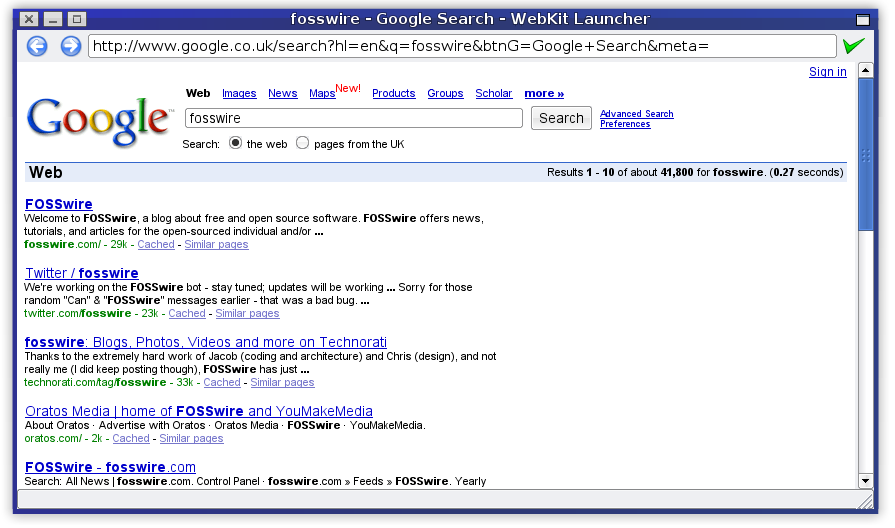
At this point, you should get a basic test browser, running GTK inside WebKit, looking something like the screenshot below! Now, just to build Epiphany to connect to our new WebKit installation.

Now, let's download the source code to Epiphany which you can find on this page. At the time of writing, that's version 2.20.2, so that's what I'll be using in this tutorial.
You'll also need to have all the dependencies for Epiphany satisfied, or it won't build properly. Ubuntu users can use the following apt command to automatically pull down dependencies and install them:
$ sudo apt-get build-dep epiphany
$ sudo apt-get install gnome-doc-utils
Once you've downloaded that, extract it as normal and set up our build environment as follows:
$ tar xjvf epiphany-2.20.2.tar.bz2
$ cd epiphany-2.20.2
$ export PKG_CONFIG_PATH=/lib/pkgconfig
$ sudo cp /lib/pkgconfig/WebKitGtk.pc /lib/pkgconfig/WebKitGdk.pc
We run configure with a simple command to enable WebKit:
$ ./configure --with-engine=webkit
And make like anything else!
$ make
$ sudo make install