
OK, so the commercial version of Solaris strictly speaking isn't free software/open source (although quite a lot of the code is now open, thanks to the OpenSolaris project). But still, since we do quite a lot of Linux and other Unix stuff here on FOSSwire, I thought I might take a quick excursion into Sun's Unix.
I'm pretty sure we will also be taking a look at some OpenSolaris distributions in the near future, but for now I'm going to take a quick look at the commercial Solaris 10.
While it is commercial, you can get a copy for no charge (for evaluation and/or personal use, and apparently some commercial use too) after registering with Sun. You can start the download process at this page.
If you're using standard PC hardware like I am (I don't have access to any Sun/SPARC hardware, but apparently it's very good), then make sure you get yourself the x86/x64 version of Solaris.
After downloading the DVD or CD images, you'll need to obviously burn them to a disc and then pop them in your computer and reboot. Sadly, it isn't a live CD, so you'll either need to commit to installing on a physical machine, or use a virtual machine solution like QEMU or VMware. I'll be using virtualisation for this tutorial - partly so I don't have to fiddle around dual booting. If you don't want to lose data, I'd recommend trying out Solaris in a VM first.
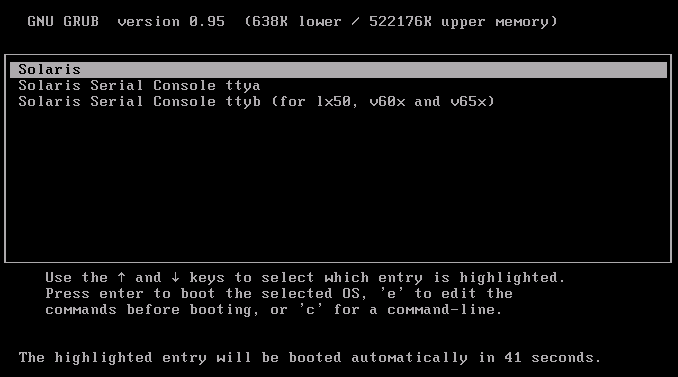
Either way, once you boot from the CD just press enter at the GRUB bootloader. Solaris does take a little while to get running.
Accept the default 'Solaris Interactive Start' to boot up. Next up, you'll be asked for the language, so just type the number of the language you want (I chose 0 for English) and press Enter.
After a few moments, you'll get a nice graphical installer open up.
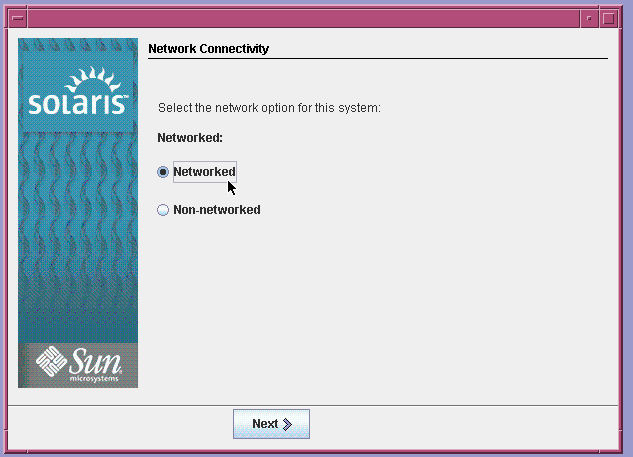
First of all, I recommend choosing networked, otherwise you won't obviously be able to use Solaris in a LAN/internet setting. You'll now be asked whether you want to use DHCP for your networking. In the vast majority of network setups, this is fine, so choose that.
Decline IPv6 and Kerberos unless you know you need them or want them.
Under name service, choose DNS and click Next.
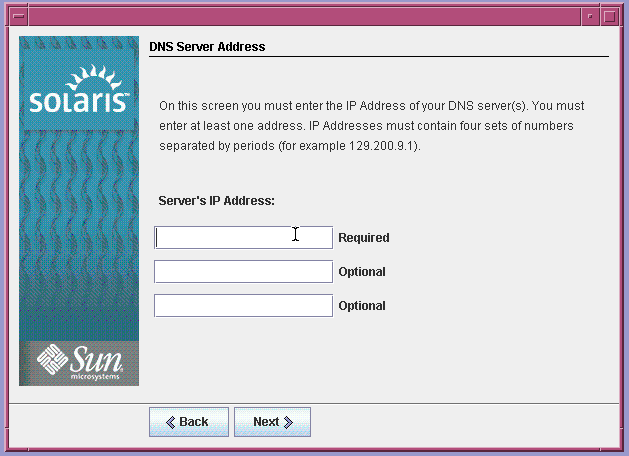
You can leave the domain field blank, but unfortunately, on the next screen you'll have to enter your DNS servers manually. If you're on a corporate network, you'll need to ask the person in charge of your network for these. In a home environment, check your router's configuration pages (usually located at http://192.168.0.1, http://192.168.1.1 or similar) and you should find the DNS server IP addresses there.
In any case, fill those in and move on. Next up, you can usually leave the search domains blank (it works fine for me, but this kind of networking isn't my area of expertise, so I could be wrong).
Now choose your time zone - this should be fairly self-explanatory, so just choose the geographical location button and click the location nearest to you. Finally, you'll be asked to confirm the time and choose your root password (which obviously you'll need to remember, as it's how you'll log in once you're installed). On the next screen, choose 'No' (it's a more secure configuration where less services are turned on by default).
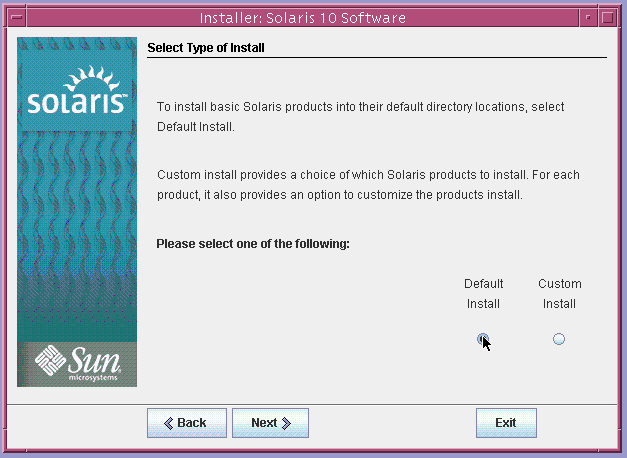
After a few more self-explanatory screens (long installer, isn't it?), you'll finally get to the package selection. You can either go for the default, or pick the packages for a custom. For this tutorial, we'll just assume you're going for the defaults. Beware - the defaults I believe will overwrite everything on the drive, so that's why I strongly recommend using a virtual machine environment if you're just testing!
Click Install Now and then let the installer do its stuff!
Once you're all installed, reboot the machine (removing your Solaris disc first) and then you'll have a standard GRUB bootloader which should start up Solaris 10 for the first time.
I'm not going to cover getting started in this tutorial, but as really quickly - enter the root as your username and then your root password you made during setup. You will then log in to the 'Java Desktop System' (that bears more than a striking resemblance to our good friend GNOME - it turns out they're actually very similar).
Well, until we next meet in Solaris, enjoy!
