After a break from this series, I'm back for part 3 of this tutorial. Today I'm going to be showing you, step-by-step, with screenshots, how to install the latest version of Ubuntu (6.10, Edgy Eft) alongside Windows XP on your computer.
Unlike some tutorials, it's not necessary to have read Parts 1 and 2, but you can if you want as they've got some good background material and could help you a bit.
Grab the CD image if you haven't already. Go to this page and click a download location near to you. If you're having trouble getting a copy of Ubuntu or burning it to a CD, check out Part 1 of this tutorial for more help (we're now using 6.10 instead of 6.06, but your results should be the same).
So let's get started.
What you'll need
Here's what you'll need, followed by what I'm using:
- A computer running any recent version of Windows
- At least 192 MB RAM (for Ubuntu's installer)
- At least 5 GB of free, unallocated space on your hard drive (we'll talk more about this later)
- Good backups of your current system should anything go wrong
My setup
- A computer running Windows XP
- 256 MB RAM
- 10 GB of unallocated space
First steps
First of all, let's go back over that 'unallocated' space thing again. In order to install Ubuntu, it needs its own space independent of Windows to store the OS and your documents. It needs its own partitions (think of them as slices of your disk) to do this.
Normally, most people's computers simply have one great big partition with Windows on it (Windows calls it the C drive). In this tutorial, I'm going to assume you've already freed up at least 5 GB of space for Ubuntu and set it as 'unallocated space' (that means there are no partitions set up in that space, because we'll let Ubuntu's installer manage that).
You can use software like Partition Magic to shrink down your Windows partition to make some unallocated space, but that's a whole tutorial in itself. If you haven't installed Windows yet, do that now and when the installer asks you how big to make the Windows partition, answer a number of megabytes that won't fill the whole disk.
(For example, here I've chosen 10000 MB, roughly 10 GB, out of my 20 GB hard drive:
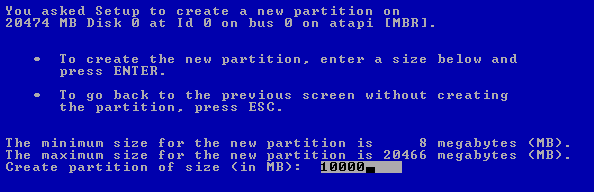
)
Right. If you think you've got the necessary unallocated space, then we can continue. Get yourself booted into Windows on your computer and log in to an administrator account.
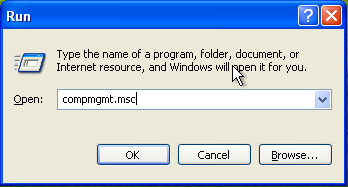
Click on Start > Run and type compmgmt.msc and click OK.
Choose the Disk Management option on the left pane and you'll see something like this:
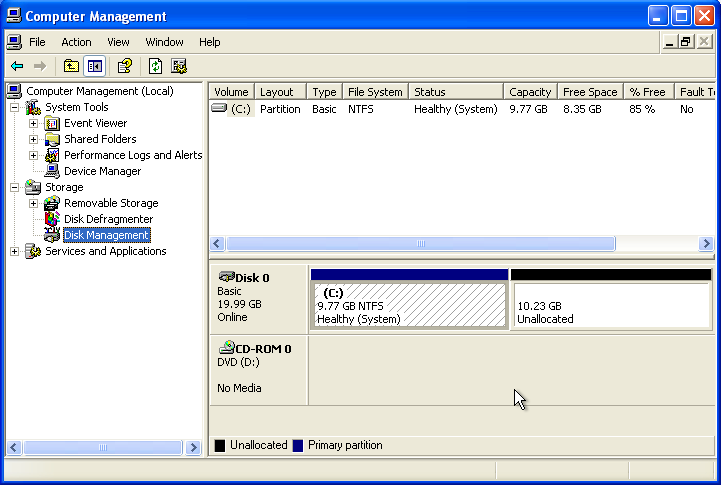
If you've got that black 'unallocated' space like I have (your disk might look slighty different, don't worry), then you're all set to go!
Installing Ubuntu
Installing Ubuntu is really easy. Once you've got your partitions set up properly so there is unallocated space, that really is the hard bit out of the way.
Pop in the Ubuntu CD and restart your computer. If your computer isn't set up to boot from CD, (most are) then you'll need to change that setting now.
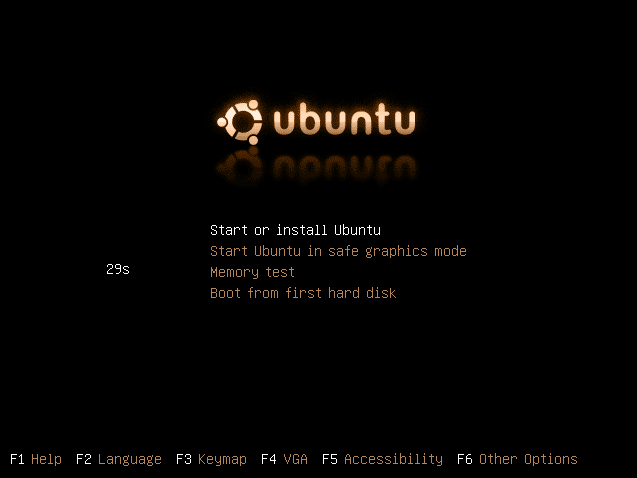
Press Enter when you see the menu to boot straight into a fully-working Ubuntu system. It's from there that we'll run the install. Booting up off the CD will take quite a while, especially if you don't have a lot of RAM, so be patient.
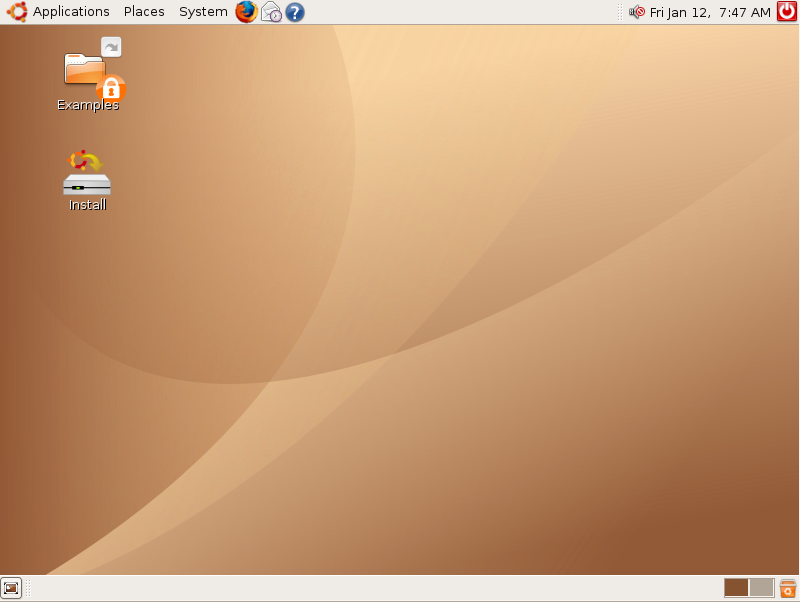
You'll know when it's booted because you'll be greeted with the trademark golden-brown desktop ready for you to use. You can have a play around if you like, bearing in mind it will be very much slower than it is when it's installed.
When you're ready to install, double-click the install icon on the desktop to start installing (be patient - the installer takes a second or two to get started).
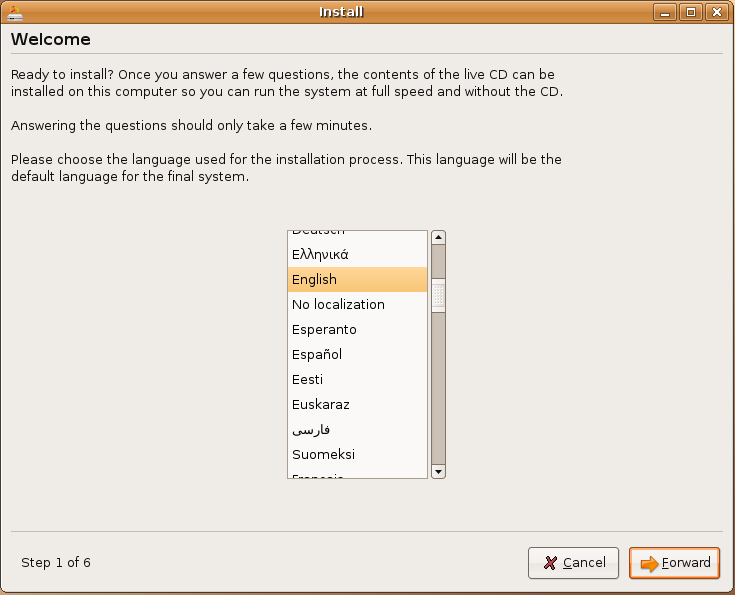
First of all, pick your language and click Forward. Nice and easy.
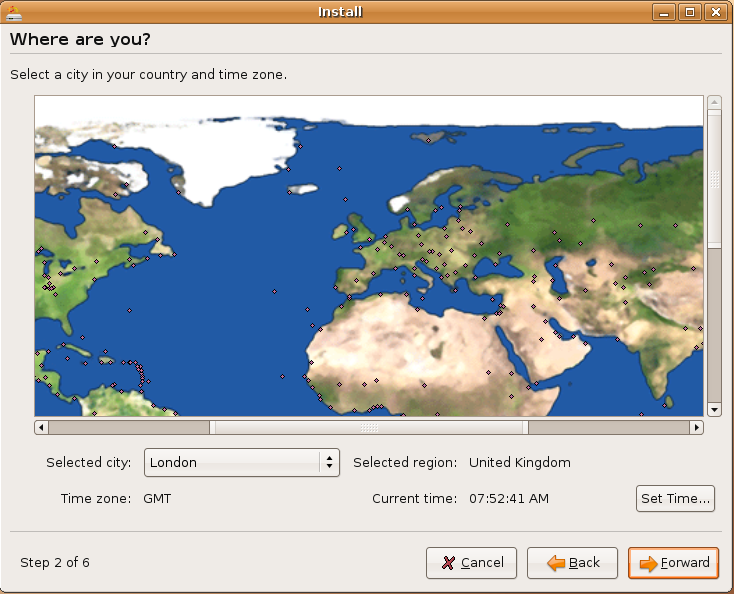
Now, click your area on the map to zoom in, and then click the city closest to you to set the time zone. Still, pretty easy, right?
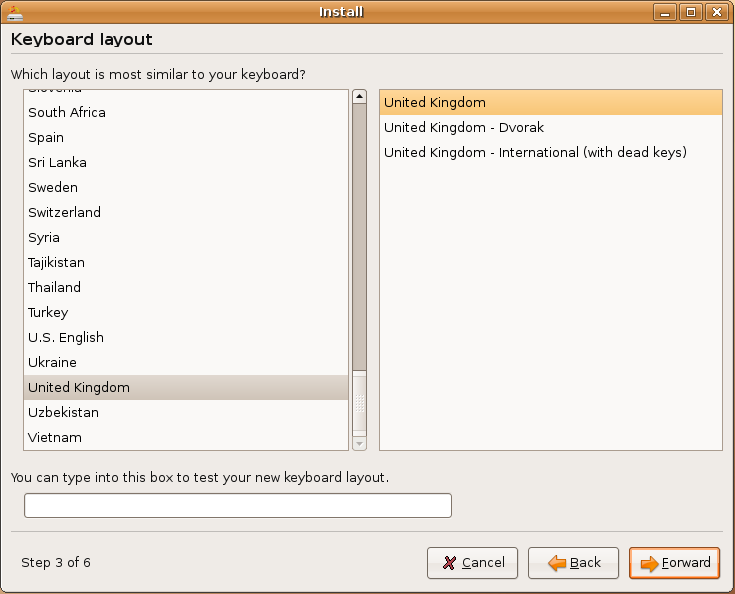
Pick your country/region on the left, and then choose your current keyboard layout on the right (you can use the box at the bottom to test it's the right keyboard layout for you).
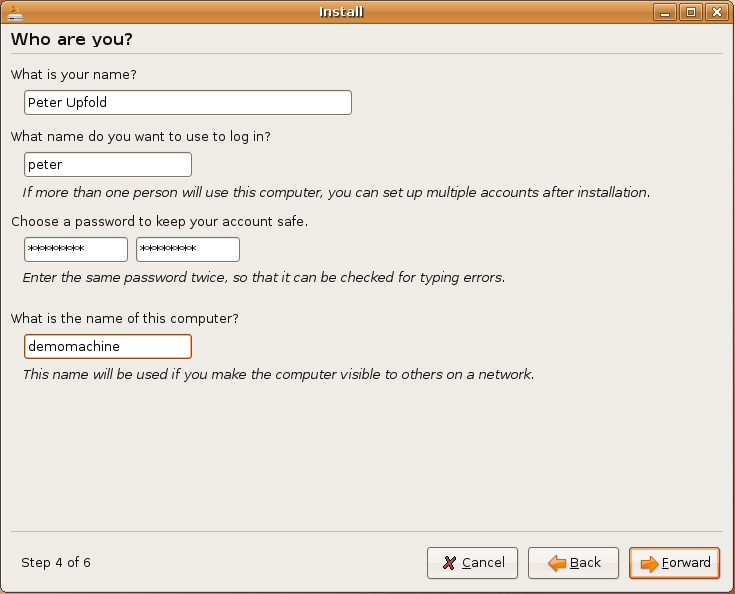
Enter your name, your login name, your user password and type in the name of your computer in the boxes. Remember this login name and password - it's the first user that Ubuntu creates and it's the one that will have the ability to use administrator functions (like adding more users).
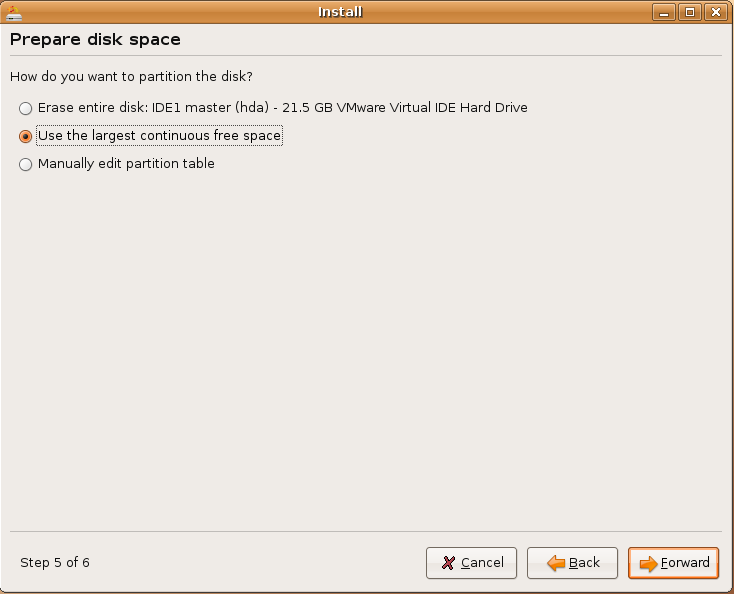
This is the only slightly hard bit here. Make sure you pick the second radio button, the one entitled 'Use the largest continuous free space'. This tells Ubuntu to use that massive chunk of unallocated space we made earlier and to set it up itself. Don't whatever you do choose the first option, unless you want to get rid of Windows. The third option is for geeks, avoid it for now. Click Forward.
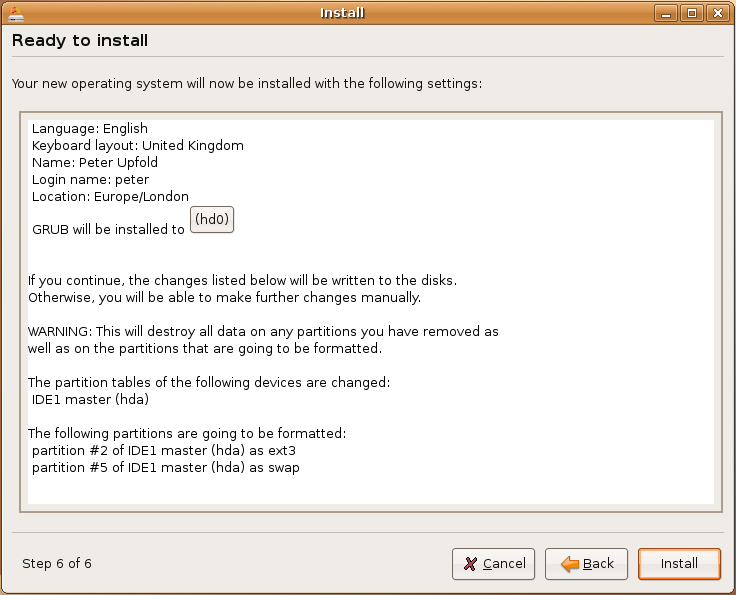
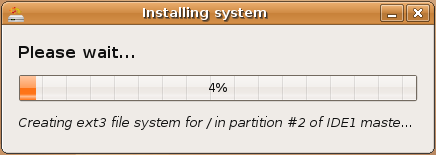
Finally, you'll get this message showing all the installation settings. Verify that they're correct, and click Install. That's it. You can go off now and let the installer do its work.
Booting up
When it's all done, choose the option to restart your computer. When it reboots, you'll see a boot menu which lets you pick which OS you want to load up. By default, Ubuntu will put itself at the top and it should have found your Windows installation.
To boot Ubuntu, just press Enter at this boot screen. To boot Windows, simply press the down arrow key until the Windows entry is highlighted, and press Enter. Windows will boot like nothing has happened!
In a different tutorial, I'll show you how to change the default OS so it's the other way round, and Windows remains your default OS but you have the option of Ubuntu. That tutorial is here - and it's really really easy to do!
And that really is it! You now have Ubuntu and Windows XP co-existing peacefully on the same machine and you can have a play around with Linux at your leisure.
