Many of us have been in this scenario - you're on the move, using a random WiFi connection that you can get. You want to browse around to all your favourite sites, including ones where you log in over normal HTTP, but you're not entirely convinced of the security of the connection, so you don't.
If you have access to pretty much any server running SSH where you can log in, you actually can set up a secure tunnel to route all of your data through using nothing more than what you already have. Kind of like a very simple VPN, that you can do on the fly.
This assumes your client/laptop is running Linux, Mac OS X or another Unix-like OS where ssh is installed and on the command line. We'll also be configuring Firefox as the browser to route traffic through the tunnel. Windows users can use PuTTY to achieve the same effect.
Set Up the Tunnel
From your terminal, log in to your SSH server with the normal command, but add -D and a port number, to set up your tunnel on that local port. Something like this:
$ ssh -D 1080 user@host
You'll be logged in as normal, and the prompt should come up. What has also happened, however, is that your SSH client is now listening on local port 1080. Anything you tunnel through there will go securely to the SSH server, and responses sent back through that tunnel.
Before we move on to configuring Firefox to route through this, here are a few more options for that command. If you don't want a prompt to come up, i.e. you just want to set up the tunnel and don't need to actually interactively log in to the server, add the -N switch, like so:
$ ssh -ND 1080 user@host
Also, you can use gzip compression to speed up the transfer. Combined with no login, that is:
$ ssh -CND 1080 user@host
Configuring Firefox
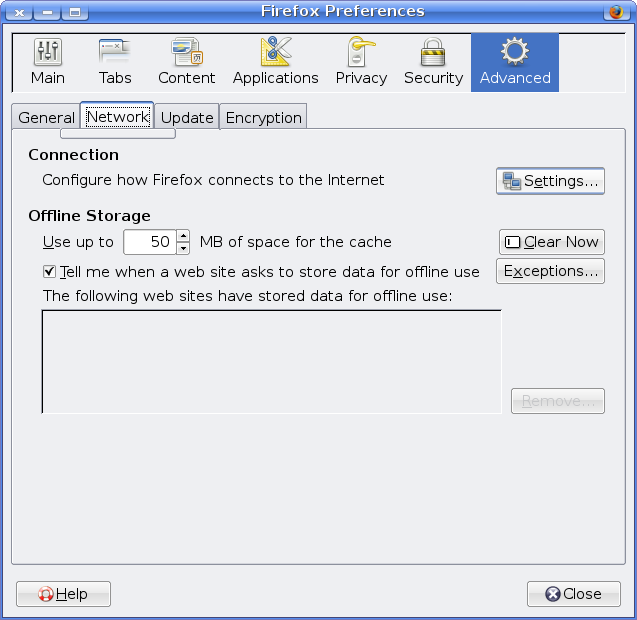
Our tunnel is now up and running, and should be accepting traffic. To configure Firefox to use this tunnel, first go to Edit > Preferences and choose the Advanced section.

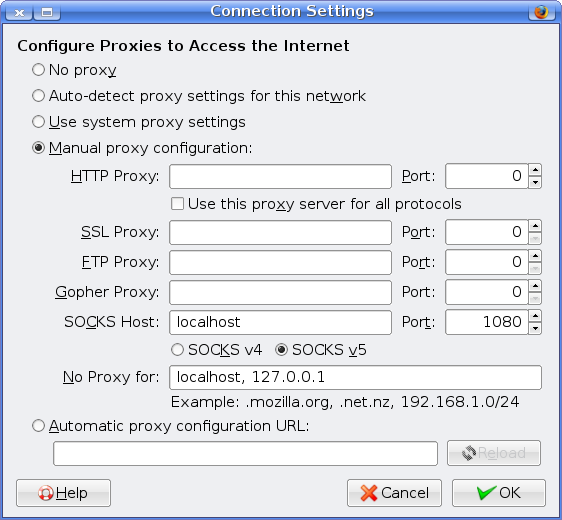
Under Network, click the Settings button. Choose a Manual proxy configuration.
Under SOCKS Host, put localhost and port 1080. Leave it on SOCKS v5.

Say OK to that, close Preferences and now use something like Check IP to confirm that your IP address now appears to the outside world as your SSH server's IP address. This tells you that your traffic is being tunnelled and you can now do anything you wish without fear of snooping (provided you trust your SSH server and its connection, of course).
Finishing Up
When you're back home or you've closed the SSH session, make sure to go back to that dialogue in Firefox and choose No proxy (or whatever it was set to before). Otherwise, you won't be loading any pages any time soon.
Speaking of which, when you're done, go back to that SSH session in your terminal window and hit Ctrl+C to drop the connection and close your tunnel down.
This is a really simple way to securely browse on untrusted connections and the fact that it doesn't require any special setup on the SSH server makes it particularly easy when you just happen to find a moment when you need to use it.
Quick, easy and gets the job done. You can't ask for much more than that.